+44 (0)121 550 0933
E-Mail Us  •  +44 (0)121 550 0933

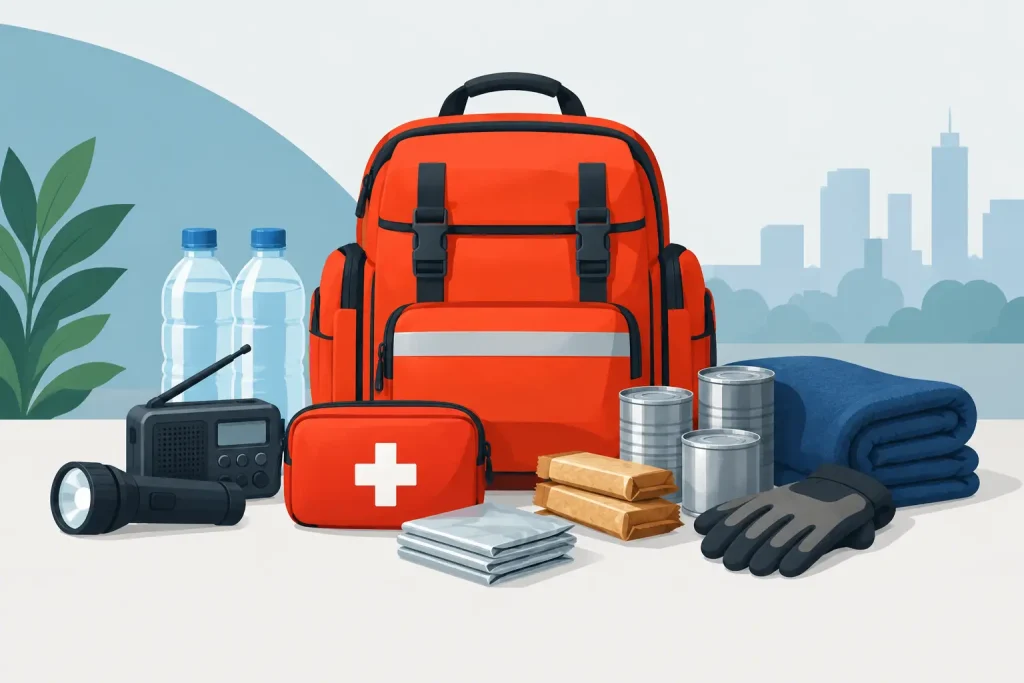
Emergency Response Kit Bags for Operational Readiness

Emergency Response Kit Bags for Operational Readiness

When a crew is called out, equipment cannot be buried, unprotected or difficult to carry. Emergency response kit bags are not simply storage. They are part of the deployment system, helping personnel move essential protective equipment, medical supplies and operational tools from vehicle to incident with pace and control.

For search and rescue, fire and rescue, coastguard, medical and tactical teams, the right bag supports readiness before an incident begins. The wrong one can create avoidable delays: wet clothing contaminating dry kit, critical items disappearing into a single main compartment, straps failing under load, or a bag that cannot be carried safely over uneven ground.

What an Operational Kit Bag Must Do

A bag should be specified around the role, the equipment load and the environment in which it will be used. Capacity matters, but it is only one part of the decision. A large holdall may carry substantial volume, for example, but it can become difficult to manage if it has no internal structure or if the load is routinely moved by one person.

Operational kit bags need to protect contents from weather, dirt, abrasion and repeated handling. For teams working near water, in exposed upland locations or around vehicles and machinery, durable outer fabrics and dependable closures are essential. Water-resistant construction helps protect kit during transfer and short periods in poor weather, although it should not be mistaken for full submersion protection unless the bag is specifically designed and tested for that purpose.

The carrying system is equally important. Reinforced grab handles assist fast loading and unloading, while adjustable shoulder straps can reduce strain over longer distances. Backpack straps may be the better choice where access involves rough terrain, stairs or long walks from a landing site. There is always a trade-off: more padding and harness support can improve comfort, but it also adds bulk and may affect how easily the bag stows in a vehicle or aircraft.

Choosing Emergency Response Kit Bags by Task

A single bag specification rarely serves every function well. Procurement teams should start by identifying what the bag must support on a typical deployment, then test that requirement against exceptional but realistic conditions.

Personal deployment and shift kit

Personal issue bags are commonly used for spare clothing, waterproof layers, footwear, gloves, headwear, hydration and personal protective equipment. They need sufficient space for a full shift or extended call-out without encouraging crews to overfill them. A wide opening is particularly useful, allowing users to see the contents quickly rather than searching through layers of kit under poor lighting.

For this type of use, compartmentalisation should remain practical. Separate sections for wet or contaminated garments, clean base layers and footwear help maintain hygiene and protect equipment. Internal pockets are useful for small items, but too many narrow pockets can slow access when personnel are wearing gloves.

Medical and first-response equipment

Medical response bags require a different approach. Rapid identification and a predictable layout are more valuable than maximum capacity. Clear internal organisation, colour-coded pouches where a service uses them, and secure retention for delicate items can reduce hesitation at the point of care.

The bag must also be easy to clean. Fluids, mud and repeated vehicle use place high demands on linings, zip tracks and handles. Consider whether removable internal organisers can be disinfected or replaced, and whether the exterior allows markings to remain visible after regular cleaning. A bag that looks professional but retains contamination or becomes difficult to maintain is a poor operational choice.

Search, rescue and technical response

Search and rescue personnel often carry equipment over distance and in changing weather. Load balance, external attachment options and a secure fit become more significant than they are for a bag that moves only from appliance to scene. Teams may need room for layers, food, lighting, communications accessories, navigation equipment and specialist rescue items.

Avoid treating external attachment points as a reason to carry unlimited equipment. Loose or poorly secured items can snag, shift the load and introduce hazards during movement. Any externally carried equipment should be purposefully attached, checked before deployment and compatible with the team’s operating procedures.

Vehicle-based and incident support kit

Larger holdalls and equipment bags are well suited to vehicle-based stores, welfare equipment, replacement PPE and role-specific modules. Their priority is straightforward loading, durable handling and quick stock checks. In these applications, external identification panels, clear labelling and a consistent colour or marking system can improve accountability across multiple vehicles or teams.

A larger bag may also need to withstand being dragged, stacked or moved through tight compartments. Reinforced bases and protected corners are worth considering, especially where the bag will routinely contact hardstanding, boat decks or station floors. This is where apparent savings on light-duty luggage tend to disappear quickly.

Build a Layout That Works Under Pressure

The most effective emergency response kit bags follow the principle of access by urgency. Items needed immediately should be reachable without unpacking the entire load. Equipment used together should be stored together. Spare or contingency items can sit deeper in the bag, provided they remain protected and identifiable.

Before standardising a layout, ask experienced users to pack the proposed bag while wearing their usual gloves and outer layers. Then ask them to retrieve key items in reduced light, inside a vehicle and after the bag has been carried. This simple trial reveals problems that are not obvious on a product specification sheet, such as zip pulls that are too small, dividers that collapse, or pockets that cannot be accessed when the bag is worn.

A repeatable packing standard also makes handovers easier. If every team member knows where the torch, dry gloves, medical module or replacement radio battery should be, checks become faster and omissions are easier to spot. Personal preference still has a place, but critical equipment should not rely on it.

Materials, Closures and Service Life

Operational bags face abrasion, moisture, oils, salt exposure and repeated loading. Fabric weight alone does not define performance. Construction quality, stitching, reinforcement at high-stress points and the protection offered to zips and seams all influence service life.

Zips are often the first component to expose a weak specification. Choose closures suited to frequent use, particularly where dirt and grit are likely. Covered zips can offer extra protection from weather, while large pulls improve operation with gloves. Buckles and compression straps should be checked for accidental release risk and for ease of use when hands are cold or wet.

Colour selection should be based on task, policy and visibility requirements. Dark colours may conceal dirt and suit general issue, while high-visibility panels or identifying patches can improve recognition at an incident. Where a bag forms part of a uniformed team’s presentation, consistent branding, embroidery or woven identification can support a professional and accountable appearance without compromising function.

Procurement Should Include the Whole Lifecycle

The purchase price is only part of the cost. A bag that is difficult to repair, poorly suited to cleaning or unable to accommodate changing equipment can create recurring replacement costs and inconsistent issue across the team.

Specify expected use, load weight, exposure conditions and required identification before comparing options. Request samples where practical and carry out user trials with the actual equipment, not approximations. Consider whether replacement components, alterations or repairs are available, especially for specialist teams that depend on a consistent configuration.

For organisations issuing both clothing and carry equipment, a coordinated approach can prevent predictable conflicts. A bag should work with protective outerwear, body armour, helmets and gloves rather than compete with them. Rig Equipment’s experience supporting service-specific clothing and equipment programmes reflects the value of considering the operator as a complete system, not a collection of individual purchases.

Inspection, Cleaning and Repacking

A well-specified bag still needs a routine. Inspect straps, handles, stitching, zips and buckles after demanding deployments, particularly following saltwater exposure, mud, heat or contact with contaminants. Remove debris from zip tracks, clean according to the manufacturer’s guidance and dry the bag fully before storage to prevent odour, mould and material deterioration.

Repacking should be deliberate, not an afterthought at the end of a long shift. Replace used consumables, check batteries, remove damaged items and return equipment to its agreed location. A bag that is clean, complete and correctly packed at the end of one incident is ready for the next call without creating an avoidable burden for the incoming crew.

The best bag is rarely the one with the most features. It is the one that protects the right equipment, carries predictably, survives the operational environment and allows a trained professional to find what they need without losing time.
Chemical Protective Clothing Guide for Teams

A chemical release rarely allows time for trial and error. Whether the hazard is a fuel spill at a coastal rescue site, corrosive contamination after a road incident, or an unknown substance in a confined operational area, the protective system must match the risk before personnel enter the zone. This chemical protective clothing guide sets out how emergency and defence teams can specify clothing that protects the wearer without compromising the mobility, communication and endurance the task demands.

Chemical protection is not a single garment category. It is a controlled system of clothing, gloves, footwear, respiratory protection and procedures, selected against a known or suspected hazard. The right choice depends on the chemical, its concentration, exposure route, temperature, duration of work and the wider operational environment.

Chemical protective clothing guide: start with the hazard

The first question is not, “What is the toughest suit available?” It is, “What can harm the wearer, and how?” Chemical hazards can penetrate, permeate or degrade materials. A fabric that resists splashes from one substance may offer limited protection against another, particularly where prolonged contact, vapour exposure or pressurised spray is involved.

A sound risk assessment should identify the chemical or credible range of chemicals, using incident information, safety data and specialist advice where available. Consider whether the substance is liquid, solid, gas or vapour; whether it is corrosive, toxic, flammable or infectious; and whether it will be encountered as a brief splash or sustained contamination.

The incident environment changes the answer. Heat can increase chemical permeation and place significant physiological strain on the wearer. Wind can alter vapour exposure. Rough ground, wreckage, ladders and vehicle access raise the risk of abrasion or tearing. For responders, the clothing must protect against the chemical while allowing safe movement through the scene.

Where the agent remains unknown, teams should work from a cautious, formally agreed approach and escalate to specialist hazardous materials capability as required. Clothing should never be used to justify entering an area beyond the team’s training, respiratory protection capability or command plan.

Understand the protection level, not just the material

Chemical protective garments are commonly described by their design type and by the performance data supporting their material. Neither should be considered in isolation. A highly resistant fabric can still leave vulnerabilities at seams, zip closures, interfaces and damaged areas.

For liquid hazards, the distinction between a garment designed for limited spray and one intended for a higher level of liquid protection matters. Pressurised jets, for example, demand a different level of barrier performance from low-pressure splash exposure. Gas-tight or vapour-tight protection may be necessary in specific circumstances, but it brings greater complexity, heat burden and operational restrictions.

Relevant European and UK-recognised standards can help procurement teams compare claims consistently. Standards in the EN 943 series address chemical protective clothing for liquid, gaseous and vapour hazards, while other standards cover limited-use protective clothing and specific protective properties. A standard marking is not a blanket approval for every chemical or every operational scenario. The manufacturer’s chemical resistance data, including breakthrough and degradation information, remains essential.

For fire and rescue, maritime and tactical teams, a further distinction is critical: flame-resistant or weatherproof clothing is not automatically chemical protective clothing. A garment may perform exceptionally in rain, wind or heat exposure without providing the barrier needed for hazardous substances. Layering incompatible garments can also create untested interfaces and trap contamination.

Permeation, penetration and degradation

These terms are often used together, but they describe different failure modes. Penetration is chemical movement through openings, seams, pinholes or damaged material. Permeation is movement through the material at a molecular level, sometimes without any visible sign. Degradation is a physical change such as swelling, brittleness, softening or loss of strength.

This is why appearance alone is not a reliable inspection method after exposure. A suit may look serviceable while its protective properties have been compromised. Follow the garment manufacturer’s instructions, incident decontamination procedures and local policy when deciding whether an item can return to service.

Build the complete protective system

The most capable chemical suit can be defeated by an unsuitable glove, boot or face seal. Every interface needs to be considered before deployment: cuffs and gloves, trouser legs and footwear, hood and respiratory protection, and closures around the torso.

Gloves should be selected for chemical resistance as well as the dexterity needed for valves, casualties, communications equipment and casualty care. A glove that is chemically suitable but too bulky for the task can encourage unsafe shortcuts. Similarly, footwear must resist the anticipated chemical exposure while providing the grip, ankle support and puncture resistance needed at the scene.

Respiratory protection must be selected separately and integrated correctly. Chemical clothing does not replace respiratory protection, and a respirator or breathing apparatus configuration can affect hood fit, communication and the integrity of the ensemble. Where a suit is intended to work with breathing apparatus, teams should use the specified configuration and train in it, rather than assuming components are interchangeable.

Visibility, identification and communications are also operational requirements. High-visibility markings, rank slides, team identifiers, body-worn lighting and radio equipment must not compromise the barrier or create snag risks. If a bespoke solution is required, it should be developed around the complete task rather than added after issue.

Fit, movement and heat are safety factors

Chemical protective clothing must be large enough to permit climbing, kneeling, casualty handling and safe reach, but not so loose that it catches on equipment or creates excess material at seals. Sizing should be based on measured users and the actual layers or equipment worn beneath the garment.

Fit trials should include realistic movements. Ask the wearer to enter and exit a vehicle, operate communications, work at ground level, use their gloves and adopt positions needed for rescue or medical intervention. Procurement samples assessed only while standing in a stores area do not reveal the same problems.

Heat stress is a major constraint, particularly with impermeable garments. The more complete the barrier, the less easily body heat and moisture can escape. Work-rest cycles, hydration, incident duration, ambient conditions and relief arrangements should therefore form part of the deployment plan. A higher protection level may be necessary, but it may also shorten safe working time.

Donning, doffing and decontamination need equal attention

Many exposures occur during removal, when a fatigued wearer touches contaminated surfaces or a colleague breaks the sequence. Teams need a rehearsed donning and doffing process with clear roles, clean and contaminated zones, and supervision where the task or risk warrants it.

Before entry, inspect the garment for damaged seams, worn closures, punctures, contamination and incorrect assembly. Confirm that gloves, boots and respiratory equipment are correctly fitted and that the wearer can communicate distress or a need to withdraw. A final buddy check is a simple control with significant value.

After use, decontaminate in accordance with the incident plan and manufacturer guidance. Do not make assumptions about machine washing, drying, repair or reissue. Some garments are intended for limited use; others may be professionally cleaned and inspected under defined conditions. Chemical exposure, especially where the substance is unknown, may require disposal rather than return to stock.

Specify for service life, not just purchase price

For organisational buyers, the lowest unit cost can become the most expensive option if garments fail early, fit poorly or cannot be supported with replacement sizes and repairs. Specify the performance required, the expected duty cycle, storage conditions, training use and likely replenishment demand.

Ask suppliers for clear documentation on standards, chemical resistance, sizing, care, shelf life and compatibility. Confirm lead times for replacements and whether the supplier can support alterations, identification, embroidery or badging without undermining the garment’s protective performance. This matters when issuing across mixed teams, where a consistent appearance must sit alongside individual fit and task-specific equipment.

Rig Equipment supports operational clothing programmes with measurement guidance and bespoke development, helping teams consider the full wear system rather than treating protective garments as an isolated purchase. For chemical protection in particular, the final specification should always be validated against the employer’s risk assessment and the garment manufacturer’s technical data.

The best protective clothing is not necessarily the heaviest or most expensive option. It is the correctly certified, correctly fitted and properly maintained system that gives trained personnel the protection they need to complete the task and return safely.

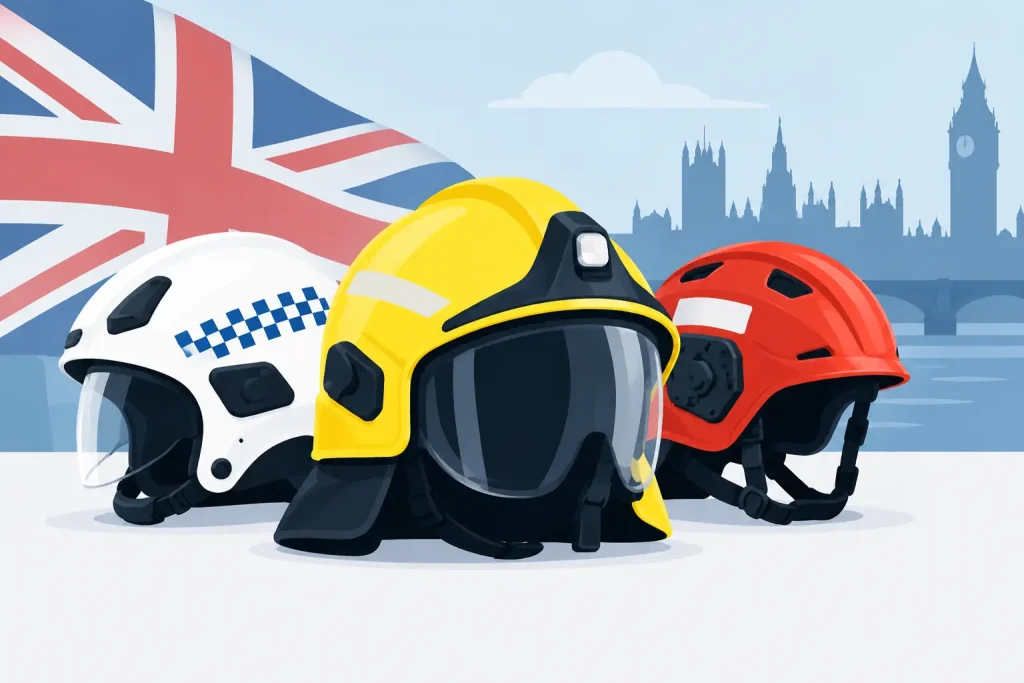
Best Emergency Response Helmets for UK Crews

Best Emergency Response Helmets for UK Crews

A helmet that is technically compliant but left in a locker because it is heavy, unstable or incompatible with a crew member’s equipment is not protecting anyone. The best emergency response helmets are those specified for the real hazards, worn correctly for the full task, and supported with a practical inspection and replacement programme.

For UK emergency services, this is rarely a simple catalogue decision. A crew may move from vehicle extrication to working at height, from a coastal search in driving rain to casualty care under low light. The correct helmet depends on the exposure, the role, the other PPE in use and the operational standard the organisation must meet.

What makes an emergency response helmet the right choice?

Protection begins with the hazard assessment, not with appearance. Impact from falling debris, penetration, heat and flame, electrical exposure, rope access, water operations, noise, poor visibility and prolonged wear all place different demands on a helmet system.

A structural firefighting helmet, for example, is designed for a very different environment from a technical rescue helmet. Fire crews may need heat and flame resistance, a substantial rear neck protector, eye and face protection, and compatibility with breathing apparatus. Search and rescue personnel working around cliffs, confined spaces or unstable structures may prioritise low weight, side-impact coverage, ventilation, a secure chinstrap and dependable headtorch mounting.

The best specification is therefore not necessarily the highest-priced or most feature-heavy option. It is the one that protects the wearer without compromising movement, communications, vision or task performance. Where teams undertake multiple operational roles, a procurement plan may require more than one helmet type rather than asking a single model to cover incompatible risks.

Start with the relevant standards

A recognised standard provides a baseline for performance, but it does not replace a role-specific risk assessment. Procurement teams should confirm which standard applies to the intended use and verify that the supplied configuration, including any visor or accessory, remains compliant.

For structural firefighting, EN 443 is a key European standard for helmets used in firefighting in buildings and other structures. Technical rescue and mountaineering-style helmets are commonly assessed to EN 12492, which includes retention requirements suited to work where a helmet being displaced can be a critical risk. Industrial safety helmets are often specified to EN 397, although this standard alone may not address the side-impact, retention or heat performance required for emergency response work.

These categories are not interchangeable. An EN 397 industrial helmet may be suitable for a controlled worksite task but unsuitable for rope rescue or fireground operations. Equally, a rescue helmet should not be treated as a structural firefighting helmet simply because it offers excellent impact protection.

Standards also need reading alongside the manufacturer’s instructions. Optional performance tests, accessory approvals, temperature limits and service-life guidance can materially affect a purchasing decision. Ask for current declarations of conformity and technical documentation, particularly when issuing equipment across several teams or locations.

Do not specify by standard alone

Two helmets carrying the same standard can feel markedly different in service. Shell geometry, suspension design, adjustment range and accessory interfaces determine whether protection stays correctly positioned during crawling, lifting, climbing or casualty handling.

Trial samples with representative users before committing to a large issue. Include personnel with different head sizes and hairstyles, as well as users who routinely wear prescription eyewear, communications headsets, hearing protection, respiratory protection or cold-weather hoods. A good trial reflects a real shift, not five minutes in a stores room.

Fit and retention are operational features

A helmet must sit level, remain stable when the wearer looks up or down, and resist rolling or lifting under movement. Adjustment should be achievable with gloved hands where required, without creating pressure points that become painful after several hours.

The retention system deserves close attention. Chinstraps and rear adjustment assemblies should hold the helmet securely without restricting speech, jaw movement or the seal and fit of other PPE. For work at height, in fast-moving water or around rotating equipment, an insecure helmet can become a secondary hazard.

Sizing must be managed as an issue process, not an afterthought. Measure personnel properly, record the selected size and adjustment setting where practical, and provide a fitting check at handover. This is particularly valuable for retained crews, volunteer teams and organisations with geographically dispersed personnel.

Comfort is not a soft consideration. Fatigue affects compliance. A balanced helmet with effective internal padding and an appropriate weight distribution is more likely to be worn consistently during long searches, incident command support or repeated training evolutions.

Build the helmet system around the task

Emergency helmets are often platforms rather than stand-alone items. The right accessories can improve safety, but only if they are approved for the helmet and do not create snag, balance or compatibility problems.

For low-light operations, an integrated or purpose-designed headtorch mount is preferable to improvised tape or straps. It keeps the beam stable and reduces the chance of an accessory detaching during a search. Consider the location of the battery pack, the availability of replacement batteries, the effect on balance and whether the light can be operated with gloves.

Eye and face protection need the same discipline. Clear visors can protect against dust, splashes and debris, while tinted options may assist in bright conditions. However, a visor should not impair the use of breathing apparatus, spectacles or communications equipment. Any requirement for chemical splash protection must be assessed against the relevant PPE standard and incident procedure rather than assumed from a general-purpose visor.

High-visibility colouring and reflective markings can aid team identification in darkness, smoke or poor weather. They are useful, but should complement – not replace – lighting, command procedures and personal location systems. In certain tactical or aviation environments, high visibility may not be appropriate, so colour choice must follow the operational profile.

Communications integration is increasingly important for specialist rescue, medical and flight operations. Check headset compatibility early. A helmet that accepts a headset but forces an awkward fit, blocks access to controls or creates painful pressure beneath ear defenders will undermine the purpose of the system.

Durability, care and replacement matter as much as purchase price

Helmets are exposed to UV light, salt, fuel residues, soot, cleaning agents, drops and repeated transport. These conditions can degrade components long before a shell appears visibly damaged. The shell, liner, suspension, chinstrap, visor and accessory mounts should all be inspected according to the manufacturer’s guidance.

After a significant impact, heat exposure, chemical contamination or suspected structural damage, remove the helmet from service pending assessment. Do not rely on a visual check alone. Some damage is not obvious, and field repairs using unapproved parts can invalidate the equipment’s protective performance.

A practical asset register helps teams control inspection dates, issue history, repairs and retirement. It also reduces the risk of mixed configurations where a visor, liner or attachment has been transferred between incompatible models. For organisations managing multiple stations or specialist units, this record keeping supports consistency and defensible PPE governance.

Cleaning should be controlled too. Avoid solvents, abrasive methods and unapproved disinfectants. These may damage plastics, coatings, visor materials or textile components. Establish a cleaning routine that reflects the risk of blood-borne contamination, smoke residues or saltwater exposure while following the helmet manufacturer’s instructions.

A procurement approach that protects the whole team

When selecting the best emergency response helmets, involve end users, training leads, health and safety representatives and those responsible for maintaining equipment. Define the operational scenarios first, then assess suitable certified models against fit, accessory compatibility, durability, lead times and whole-life support.

For bespoke or mixed-role teams, it may be worthwhile to standardise colour, identification markings and approved accessory packages while retaining different helmet categories for different hazards. That approach improves recognition and ordering control without forcing personnel into the wrong protection.

Rig Equipment supports operational teams with protective equipment selected around demanding service conditions, alongside practical guidance on sizing, issue and customised team presentation. The objective is straightforward: equipment should arrive ready to work, fit the user properly and perform predictably when conditions deteriorate.

The most dependable helmet decision is the one made before the incident, tested by the people who will wear it, maintained throughout its service life and reviewed whenever the role, risk or operating environment changes.

How to Measure Operational Uniforms Correctly

How to Measure Operational Uniforms Correctly

A jacket that binds when reaching for a casualty, trousers that catch at the knee, or a sleeve that rides above a glove can distract from a task that demands full attention. Knowing how to measure operational uniforms correctly helps protect mobility, preserves the intended coverage of protective clothing and gives every team member a professional, dependable fit.

Operational sizing is not the same as choosing everyday clothing. Emergency service and defence personnel often work in changing weather, wear base layers and PPE, carry equipment and move through confined spaces. Measurements must reflect the wearer’s working position and the layers they will use, not simply their preferred fit in casual clothes.

How to measure operational uniforms for service use

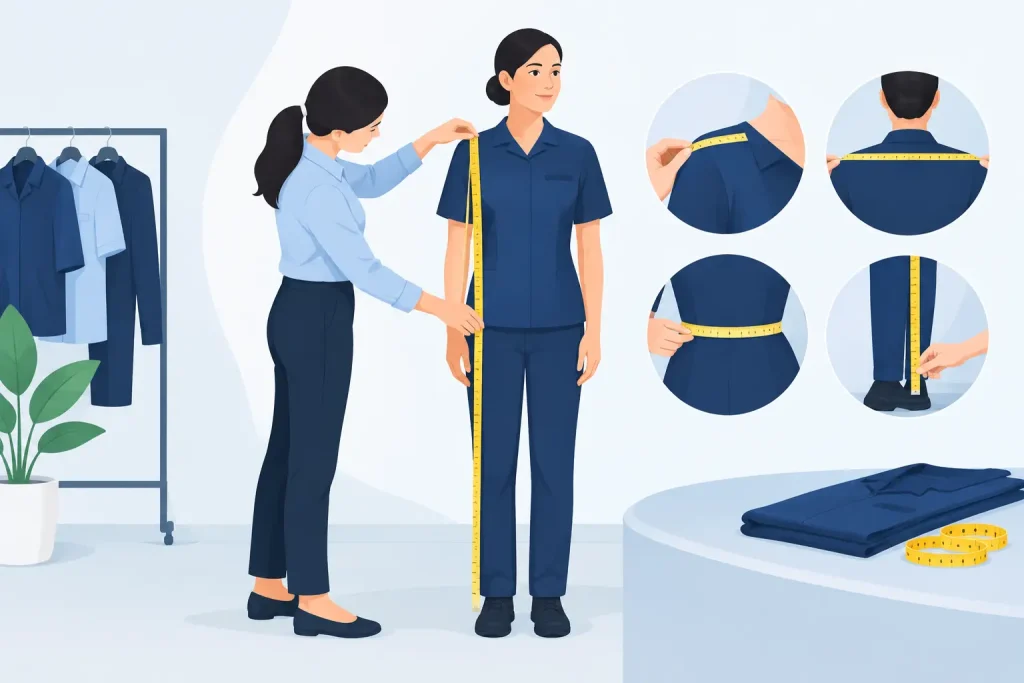
Measure the wearer over lightweight base clothing, such as the type of undergarments or base layer normally worn on duty. Do not measure over a bulky fleece, waterproof outer layer or body armour unless the garment specification explicitly calls for it. A flexible tailor’s tape measure is essential. Keep it level, close to the body and firm without pulling it tight.

Where possible, have a colleague take the measurements. Self-measuring commonly leads to a raised shoulder, an uneven tape line or an inaccurate waist reading. Record every figure in centimetres, then compare it with the sizing chart for the specific garment. A medium in one product is not automatically the same as a medium in another, particularly where flame-resistant garments, flight suits and weather layers are designed to different patterns.

Before starting, ask what the uniform is required to do. A coastguard responder needing room for thermal layers and a flotation device may need a different fit allowance from a medical responder working mainly indoors. A close-fitting flame-resistant base layer has a different purpose from an outer storm jacket. The correct size is always tied to the role, garment construction and equipment worn with it.

The core body measurements

For most operational jackets, shirts, combat trousers, coveralls and outerwear, five measurements provide a reliable starting point:

  • Chest: Measure around the fullest part of the chest, keeping the tape horizontal under the arms and across the shoulder blades. The wearer should breathe normally and keep their arms relaxed.
  • Waist: Measure around the natural waist, usually the narrowest part of the torso above the hip bones. Do not rely on the waistband size of existing trousers, as this can vary considerably between brands and garment styles.
  • Hip or seat: Measure around the fullest part of the hips and seat, with feet together. This is particularly important for waterproof trousers, coveralls and garments that need unrestricted crouching movement.
  • Inside leg: Measure from the crotch seam to the point where the trouser hem should finish. Take this measurement while the wearer is standing straight in duty footwear, or allow for the boot height specified for the garment.
  • Sleeve length: Measure from the centre back of the neck, across the shoulder and down the outside of the arm to the wrist. This reflects reach more accurately than measuring only from shoulder to wrist.

For coveralls and flight suits, torso length is equally significant. Measure from the base of the neck, down through the legs and back to the same point, following the body’s line. This prevents excessive tension across the back and crotch when sitting, climbing or reaching overhead. If a product sizing guide uses back length instead, follow that guide rather than substituting a different measurement.

Take measurements in a neutral stance

The wearer should stand naturally with feet around shoulder-width apart. They should not hold their breath, pull in their stomach or over-straighten their posture. These small adjustments can produce a uniform that looks correct at issue but becomes restrictive during a long operational period.

It is useful to repeat key measurements, particularly chest, waist and inside leg. If two readings differ, take a third and record the average only if the tape placement was consistent. For teams being measured at scale, use one trained measurer and one agreed method. Consistency protects against avoidable variations between stations, teams or issue dates.

Fit allowances matter as much as the numbers

Body measurements identify the starting size. Fit allowance is the additional room built into a garment so the wearer can work, layer clothing and use protective equipment. The amount required depends on the item.

A technical base layer should sit close to the skin to manage moisture effectively, but it must not restrict breathing or shoulder movement. A station shirt may need enough room to reach, drive and wear under a protective layer. Stormwear requires space for insulation and mid-layers, while still allowing cuffs, hems and collars to seal effectively against wind and rain.

Avoid automatically sizing up for every operational garment. An oversized outer layer can snag, interfere with harnesses, leave too much fabric around the hands and make equipment access slower. Conversely, sizing down to achieve a neat appearance can reduce mobility and compromise coverage. The correct choice is the size that works with the planned clothing system and the wearer’s range of movement.

For fire and rescue or other heat-exposed duties, follow the garment manufacturer’s instructions exactly. Protective performance can depend on the specified air gap and layering arrangement. Altering the fit without professional advice may affect the garment’s intended protective function.

Test the fit in operational movements

Measurements are only the first check. Once a sample garment is available, assess it in movements that reflect the wearer’s duties. The wearer should raise both arms, reach forward, kneel, squat, climb a step, sit in a vehicle position and bend to pick up equipment.

Check that the back does not pull sharply across the shoulders, the crotch does not bind, and the knees and elbows align with their intended reinforcement areas. Jacket cuffs should continue to overlap gloves when arms are extended. Trouser hems should work with operational footwear without dragging under the heel or riding high above the boot.

If body armour, a buoyancy aid, harness, radio belt or load carriage system is issued, test it with the uniform. A garment that fits well in isolation may become restrictive once the full system is worn. Pay particular attention to pocket access, collar position, shoulder movement and any pressure points created by straps.

Measuring specialist items beyond clothing

A uniform programme is rarely limited to shirts and trousers. Several related items need their own measurements or fit checks.

Headwear and helmets require head circumference, measured around the widest part of the head, just above the eyebrows and ears. A helmet must then be adjusted and tested for stability, compatibility with eye protection, communications and any respiratory equipment. Never select a helmet solely from a cap size.

For gloves, measure hand circumference around the knuckles, excluding the thumb, and hand length from the wrist crease to the tip of the middle finger. The right glove must allow dexterity for fastenings, communications and medical tasks while providing the required protection. Gloves that are too large can reduce control; gloves that are too tight can fatigue the hand and restrict circulation in cold conditions.

Footwear should be assessed with the socks worn on duty, preferably later in the day when feet may be slightly larger. Allow enough toe room for descents and prolonged standing, but ensure the heel remains secure. A boot that feels acceptable for five minutes can become a serious problem during a twelve-hour deployment.

Record measurements and plan for change

For organisational issue, keep a confidential measurement record alongside garment size, product code, length option, date of issue and any approved alteration. This supports accurate replacement orders and reduces repeated fitting time. It also makes it easier to identify recurring issues with a particular cut, role or cohort.

Measurements should be reviewed when a wearer reports poor mobility, changes role, returns after an extended absence or experiences a significant change in body shape. They should also be checked before ordering a new garment range. Patterns, fabric weights and intended layer systems differ, even when the nominal size remains familiar.

Alterations can resolve certain problems, such as trouser length or sleeve length, but they are not a substitute for selecting the correct base size. On protective garments, any alteration must be suitable for the fabric, construction and certification requirements. Repairs and modifications should retain the garment’s intended performance rather than simply improve appearance.

For larger issues, a structured fitting session is the most reliable approach. It gives procurement teams the opportunity to check size distribution, validate samples with operational users and identify bespoke requirements before committing to production. Rig Equipment can provide professional measurement guidance where teams need a practical, service-specific approach.

A well-measured uniform should become unremarkable once duty starts. It should move when the wearer moves, support the equipment they depend on and remain comfortable enough that attention stays where it belongs: on the task, the team and the people relying on them.

Fitting Tactical Duty Belts for Operational Use

A duty belt that shifts under load is more than an irritation. It can obstruct access to critical equipment, create pressure points during long periods on foot or in a vehicle, and compromise movement when the task becomes physically demanding. Fitting tactical duty belts correctly gives the wearer a stable, repeatable platform for essential equipment without restricting breathing, mobility or the effective use of other personal protective equipment.

The correct fit is not simply a matter of waist measurement. It depends on the wearer’s role, issued equipment, body armour or outerwear, the expected working position, and the conditions in which the belt will be used. A belt configured for a short patrol on foot will need different consideration from one worn by a responder climbing, driving, operating near water, or working through a prolonged incident.

Start with the operational load, not the belt size

Before selecting or adjusting a duty belt, establish exactly what it must carry. This prevents the common mistake of buying a belt to fit an empty waist, then finding it is too short, unstable or uncomfortable once pouches and equipment are installed.

Lay out the full operational load first. Consider radios, medical equipment, lighting, restraints where authorised, communication accessories, gloves, protective tools and any role-specific items. Include equipment that may only be worn during certain tasks, such as cold-weather gloves or a larger trauma pouch. The belt must accommodate its real working configuration, not an idealised lightweight version.

Measure around the position where the belt will actually sit, usually over the trousers and duty clothing rather than against the body. If the belt will be worn over a base layer, fleece, waterproof trousers or body armour components, measure with those layers in place. Seasonal changes matter. A fit that is satisfactory over summer uniform may leave too little adjustment when winter layers are required.

Check the manufacturer’s sizing guidance and choose a size that places the normal working fit close to the middle of its adjustment range. This leaves capacity to tighten the system when carrying less clothing and to expand it for additional layers. Avoid relying on the last section of hook-and-loop fastening, the final buckle setting or a belt tail that barely reaches its keeper. That is not useful adjustment range; it is a warning that the belt is undersized.

Fitting tactical duty belts as a working system

Most operational belt systems use an inner belt, outer belt, trouser belt or a combination of these. The design varies, but the objective remains the same: the loaded outer belt should resist rotation and downward movement while remaining comfortable enough for extended wear.

Fit the inner belt first, if the system uses one. It should sit level through the trouser belt loops and be firm without causing discomfort when seated. An inner belt that is overtightened can create unnecessary abdominal pressure and become uncomfortable over a long shift. One that is loose allows the outer belt to migrate and roll as equipment is drawn or replaced.

Attach the outer belt evenly, keeping its height consistent around the waist. The belt should be snug enough that a deliberate equipment draw does not pull the belt around the body, but not so tight that it limits full inhalation, bending or normal circulation. A useful test is to perform a controlled draw or remove and replace a radio while standing. If the belt twists, lifts or follows the pouch, it needs further adjustment or a different retention arrangement.

Keepers provide an additional mechanical connection between inner and outer belts. Their number and position should reflect the load and belt design. In general, they should be spaced around the waist rather than concentrated at the front. This helps prevent the outer belt from rotating under asymmetrical weight. Ensure keepers do not obstruct access to equipment, catch on clothing or interfere with the buckle.

A good fit should remain stable through ordinary movement without relying on constant readjustment. If the wearer is repeatedly pulling the belt down, turning pouches back into place or shifting the buckle, investigate the cause. It may be incorrect sizing, an overloaded section, incompatible attachment hardware or an unsuitable belt construction for the assigned load.

Position equipment for access and movement

The most effective layout is role-specific and must follow organisational policy, training and any safety restrictions. Equipment should be placed where it can be accessed consistently, preferably with the primary hand where appropriate, while avoiding items that obstruct natural movement or conflict with vehicle seating.

Start with the largest and heaviest items, because they determine how the belt balances. A radio, medical pouch or specialist tool can create a pronounced pull on one side. Where possible, offset this with suitable equipment on the opposite side or move the heaviest item closer to the rear-side position rather than directly over the hip point. Exact placement depends on the wearer’s build, vehicle use and access requirement.

Avoid building a hard, crowded section directly across the lower back. This area is frequently compressed against vehicle seats, rescue seating, harnesses and hard surfaces. Pressure there can become painful quickly and may encourage poor posture during long deployments. Rear-mounted equipment can be useful, but it must be tested while seated and when wearing any associated armour, flotation device or rucksack.

The front of the belt also needs clear space. The buckle must remain accessible, and equipment should not prevent bending, kneeling, climbing or adopting a low working position. For medical responders and search teams, front clearance can be particularly valuable when lifting, treating a casualty, using a harness or working close to the ground.

Do not assume a configuration is correct because it looks balanced while standing in front of a mirror. Test it through the movements the role demands: walking quickly, climbing steps, kneeling, getting in and out of a vehicle, sitting for a sustained period, reaching overhead and wearing wet-weather layers. If the duty belt is used with body armour, test both items together. Two well-fitted pieces of equipment can become problematic when their edges overlap or their adjustment hardware conflicts.

Carry only what the task requires

A tactical duty belt is not a storage solution for every possible item. Excess weight increases fatigue, affects posture and makes rapid access less reliable. It can also make the belt harder to fit securely, particularly for smaller wearers or personnel who must work in confined spaces.

Separate daily-carry items from contingency equipment. Items needed immediately should be secure, accessible and positioned consistently. Less urgent equipment may be better carried in a pack, vehicle organiser or role-specific bag, subject to operational procedure. This approach reduces bulk at the waist and keeps the belt focused on equipment required without delay.

Pouches should fit their contents closely enough to retain them during running, climbing and vehicle movement, while still permitting a controlled draw with gloves where necessary. Test retention with the actual issued item, not a substitute of similar size. Radio models, torches, medical dressings and protective gloves vary significantly in profile.

Check compatibility with protective clothing and PPE

Duty belts do not operate in isolation. They must work alongside flame-resistant clothing, waterproof layers, lifejackets, helmets, gloves, harnesses and body armour where required. Any change to the wider PPE system can alter belt fit and access.

For example, a storm jacket may cover critical pouches, while a flotation device may push a radio or tool into an awkward position. Thick gloves can make small release tabs difficult to operate. A belt that is acceptable for static duties may become unsafe when combined with a fall-restraint harness or when working near moving machinery. Follow the instructions and compatibility requirements for all issued PPE, and seek supervisory or equipment-manager guidance where systems overlap.

Personnel should also inspect the belt and attachment points before deployment. Look for worn hook-and-loop fastening, damaged stitching, cracked buckles, distorted pouch mounts and frayed keepers. A belt is subjected to repeated load, abrasion and weather exposure, so seemingly minor damage can affect retention over time.

Reassess fit after real use

The final fitting should happen after the belt has been worn during representative activity. A short static fitting identifies obvious issues, but it cannot reveal every pressure point or access problem. After a training session or operational deployment, ask practical questions: Did the belt rotate? Could every required item be reached while seated? Did any pouch dig in when kneeling? Did wet weather layers change access? Was anything carried that was not used or needed?

This review is especially useful when issuing equipment across a team. A standardised layout can support familiarity and interoperability, but it still needs sensible adjustment for individual body shape, handedness and operational task. Rig Equipment’s measurement and alteration support can be valuable where teams need a more considered fit across clothing and equipment systems.

A correctly fitted duty belt should become unremarkable during the job. The wearer should know where every item sits, move without fighting the load and retain reliable access when conditions deteriorate. That quiet reliability is the standard worth setting before the next callout, patrol or deployment.

Bespoke Emergency Service Uniforms That Perform

Bespoke Emergency Service Uniforms That Perform

A uniform failure rarely begins with a dramatic tear or broken fastening. More often, it starts with a sleeve that restricts a casualty carry, a collar that chafes beneath a lifejacket, or a poor fit that encourages a responder to remove a vital layer. Bespoke emergency service uniforms address these operational details before they become distractions in difficult conditions.

For procurement leads and operational commanders, bespoke does not mean cosmetic. It means specifying clothing around the real work of the team: exposure to wind, rain, heat, flame risk or contamination; the equipment worn over it; the range of movement required; and the need for every wearer to look professional and identifiable. The result should be a uniform system that supports protection, readiness and service pride without compromising mobility.

Why standard workwear is not always enough

Off-the-shelf workwear can be appropriate where the task is predictable and the working environment is controlled. Emergency services rarely operate on that basis. A coastguard team may move from a vehicle to a wet shoreline, then work beside water in driving rain. A fire and rescue crew may require garments that work with protective layers, helmets, gloves and breathing apparatus. Flight and medical personnel may need low-bulk clothing that remains practical during long shifts, transfers and confined working positions.

A standard garment can be well made yet still be wrong for the role. Pocket placement may conflict with a harness. Fabric weight may be unsuitable for the local climate or the pace of activity. A generic sizing run may leave some team members with excess material that catches on equipment, while others have too little reach through the shoulders and knees.

Bespoke development creates the opportunity to resolve these issues deliberately. It also helps organisations maintain a consistent operational appearance across mixed roles, sizes and deployments.

Bespoke emergency service uniforms start with the task

The strongest uniform specifications begin with job analysis, not a catalogue page. Before selecting fabrics, colours or badges, establish what happens during a normal shift and what happens on the worst day.

Consider the physical demands of the role. Does the wearer climb ladders, work at height, kneel beside casualties, operate in water, drive for extended periods or carry technical equipment? Those answers influence garment cut, reinforcement, articulation and adjustment points. They also determine whether a uniform should be built as a single layer or as part of a modular clothing system.

Environmental exposure matters just as much. Cold, wind and persistent rain demand a different approach from high heat, flash-fire risk or indoor clinical work. Protection must be appropriate to the assessed hazard, and any claimed performance should be supported by suitable certified materials and relevant testing. More protection is not automatically better if it causes heat stress, restricts movement or makes the garment unsuitable for the actual task.

The final consideration is interoperability. Uniforms do not work in isolation. They must function with personal protective equipment, body armour, flotation devices, radios, belts, gloves, helmets and footwear. A jacket that is excellent on its own can become impractical once a harness covers the pockets and a radio antenna catches at the collar.

Fit is a safety and performance issue

Fit is often treated as an administrative matter: collect sizes, place the order, distribute garments. For operational clothing, that approach is too narrow. Fit affects thermal comfort, dexterity, freedom of movement and the wearer’s willingness to use equipment correctly.

A well-designed bespoke garment accounts for different body shapes without making assumptions about a single ‘standard’ wearer. It can offer appropriate sleeve and leg lengths, sufficient reach across the back, room for layering and adjustment where it is genuinely useful. For specialist teams, professional measurement guidance can prevent recurring problems before production begins.

This is particularly valuable where teams include a wide range of sizes, or where a garment must accommodate specific equipment. It also reduces the costly cycle of issuing unsuitable kit, arranging alterations and holding excess stock that never gets worn.

There is, however, a balance to strike. Too many individual variations can make replacement issuing harder and reduce consistency across the team. The practical answer is usually a controlled specification: common core garments, defined options for role-specific needs, and accurate wearer records to support repeat orders.

The detail that separates a uniform from a system

The operational value of bespoke clothing is often found in the small decisions. A reinforced knee is useful when it aligns with the kneeling position. A storm flap matters when it remains secure in high wind. A two-way zip can improve access to trouser pockets or equipment, but only when it is durable and simple to operate with gloved hands.

When reviewing a proposed design, procurement teams should test four areas in realistic conditions:

  • movement while lifting, reaching, climbing, kneeling and driving;
  • access to radios, medical equipment, identification and essential tools;
  • comfort across a full shift, including wet, cold or high-output work; and
  • compatibility with the full PPE ensemble, not just the garment itself.

A wear trial is one of the most useful stages in the process. It should involve the people who will use the clothing across different roles and body types, rather than relying solely on management approval. Feedback needs to be specific. ‘The jacket feels wrong’ is less useful than ‘the chest pocket cannot be accessed when the flotation device is fastened’.

Identity, visibility and professional presentation

Emergency service uniforms must communicate authority quickly. Clear service identification reassures the public, supports multi-agency working and helps teams identify one another in low light, poor weather and crowded scenes.

This does not mean adding branding everywhere. Identification should be placed where it remains visible when outer layers and equipment are worn. Embroidery, printing and woven badges need to withstand laundering, abrasion and routine operational use. Colours and reflective elements must be selected with the working environment in mind, not simply for appearance.

There can be competing demands. High visibility may be essential for roadside, aviation or water-based work, while tactical or security-sensitive operations may require a more restrained presentation. A bespoke programme allows those needs to be managed under one controlled service identity rather than forcing every team into the same garment.

Procurement should account for the full life of the garment

The purchase price of a uniform is only one part of its cost. A lower-cost garment that loses shape, fades, fails at stress points or cannot be repaired may prove more expensive through replacements, downtime and inconsistent presentation.

A sound specification considers expected service life, wash and care requirements, available repairs and alterations, and the ability to obtain matching replacements later. This matters when organisations issue kit over several years or need to replace a single damaged item without changing the appearance of the whole team.

Flexible ordering is equally important. Large framework quantities may suit a major rollout, but emergency services also need a route for new starters, changing roles, urgent replacements and specialist one-off requirements. No minimum order quantity can be a practical advantage when it is paired with consistent patterns, fabrics and branding controls.

British-based design and manufacture can also make communication, sample review and ongoing adjustment more direct. Rig Equipment combines this approach with specialist development, measurement support, production, alterations and repair services for organisations that need more than a standard uniform issue.

Building a specification that lasts

The most dependable bespoke uniform programmes are not built around a single garment. They are built around a clear understanding of risk, role and replacement. Start with the environment and task, validate fit through wear trials, then document the approved design in enough detail that future orders remain consistent.

Keep the wearer involved after issue. A short review after early operational use can reveal whether adjustments are needed to pocket access, sizing, layering or durability. Small corrections made early are far more manageable than a full redesign after an unsuitable garment has been issued across a service.

When uniform is treated as operational equipment rather than branded clothing, the buying decision becomes clearer. The right specification gives personnel fewer compromises to manage, allowing them to focus on the incident, the casualty and the team beside them.

Smart PPE Technology for Safer Crews

Smart PPE Technology for Safer Crews

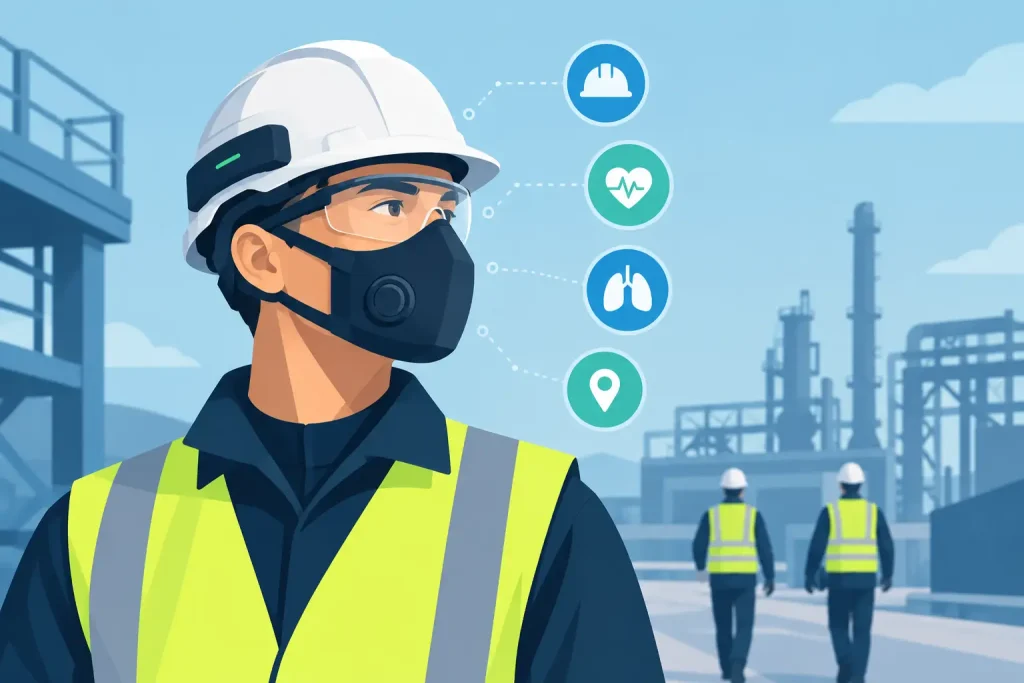
A firefighter working through heat and smoke, a coastguard crew member exposed to wind-driven spray, or a flight operative managing a casualty cannot stop to interpret a complicated device. Smart PPE technology must earn its place in that environment. It has to protect first, communicate clearly, and continue working when conditions are wet, dark, noisy, cold or physically demanding.

For emergency services and defence teams, the value is not in adding electronics to a garment or helmet for its own sake. The value lies in earlier warning, better operational awareness and evidence that helps leaders protect people before exposure becomes an incident. Used well, connected protective equipment can support safer decisions without distracting the wearer from the task in hand.

What smart PPE technology means in operational use

Smart PPE combines established protective equipment with sensors, communication hardware, location capability or data capture. It may sit within a helmet, garment, glove, boot, respiratory system or wearable device carried alongside PPE. The technology can monitor the wearer, the environment, the condition of the equipment, or a combination of all three.

A heat sensor, for example, may alert a wearer to rising thermal exposure. A fall-detection function may signal that a lone worker needs assistance. Location information can help incident command understand where teams are operating, particularly in poor visibility or on a large search area. Equipment identification systems can also record issue history, inspections and maintenance requirements.

These functions are useful only when they match a real operational requirement. A search and rescue team working across remote terrain may prioritise location confidence and emergency alerting. A fire and rescue service may focus on heat exposure, respiratory protection status and firefighter accountability. Flight crews may need compatible communications, low-light visibility and equipment that does not interfere with aircraft procedures.

Protection remains the first requirement

A common mistake is to assess a connected product as though the electronic feature is separate from the PPE. It is not. If a sensor housing creates a snag hazard, a battery affects balance, wiring reduces flexibility, or an attachment compromises flame resistance, the design has failed its primary purpose.

The protective performance of the base item must remain appropriate for the hazard. That includes flame and heat resistance where required, weather protection, impact resistance, visibility, dexterity and compatibility with other issued equipment. A jacket that collects useful data but restricts reach when operating a stretcher is not an operational improvement. Nor is a helmet-mounted unit that obstructs eye protection, hearing protection or a face seal.

Certification requires close attention. A compliant garment or helmet can be altered by the addition of third-party electronics, mounts or adhesives. Procurement teams should establish whether the completed configuration has been assessed for its intended use, rather than assuming the approval for the original item applies to every modification. This matters particularly where flame, arc, respiratory, ballistic, maritime or aviation risks are present.

Where connected PPE can make a practical difference

The strongest applications tend to address known gaps in awareness, accountability or maintenance. They should reduce workload, not create another stream of information for crews to manage.

Exposure and welfare monitoring

Heat strain, extreme cold, fatigue and environmental exposure can develop gradually. Sensors that monitor temperature, movement or physiological indicators may help identify a developing welfare concern earlier. However, readings must be interpreted carefully. Physical exertion, ambient temperature, clothing layers and individual variation all influence the result.

For this reason, smart monitoring should support trained supervisors and established welfare procedures, not replace them. A device can flag an exception. It cannot fully assess hydration, decision-making capacity, injury or the operational context around an individual.

Team location and emergency alerting

In complex incidents, knowing who is where can save critical time. Location and man-down functions can be particularly valuable for teams operating alone, entering confined areas, working offshore or moving through poor visibility.

The trade-off is reliability. Satellite positioning may be limited by buildings, dense woodland, terrain or indoor environments. Radio-based systems have their own coverage and infrastructure requirements. The right question is not whether a supplier offers tracking, but how the system performs in the places your crews actually work, including the areas where communications are already difficult.

Equipment management and readiness

Not every smart PPE application needs to operate during an incident. RFID or digital asset identification can strengthen issue control, inspection records, repair tracking and replacement planning. For organisations managing multiple stations, specialist teams or deployed assets, this can provide a clearer picture of what is in service and what requires attention.

This use case is often easier to implement because it does not add complexity to the wearer during a live task. It can also help preserve the value of quality protective equipment by making service history and repair decisions easier to manage.

Procurement questions that prevent expensive mistakes

Connected PPE should be introduced as an operational system, not purchased as an isolated product. The right specification begins with a defined risk or capability gap: missed welfare indicators, unreliable accountability, delayed equipment inspections or insufficient visibility of deployment status.

Before committing to a wider issue, teams should trial equipment with representative users in realistic conditions. That means wearing it with the full ensemble, using it in rain and low light where relevant, working through communications procedures, and testing it with gloves on. A short demonstration in a warm showroom will not reveal whether a control can be operated under stress or whether a charger is practical on a night shift.

The following checks are especially valuable when assessing smart PPE technology:

  • Confirm that the complete system maintains the required protective certifications and does not interfere with other PPE.
  • Test battery life against the longest credible shift, deployment or standby period, not the average day.
  • Establish charging, spare battery, cleaning, inspection and repair arrangements before issue.
  • Define who receives alerts, how they are escalated and what action is expected from supervisors.
  • Review data ownership, retention, access controls and any workforce privacy implications.
  • Check whether the system remains useful if network coverage, GPS or a central platform is unavailable.

Data governance deserves the same discipline as physical protection. Information about location, movement or physiological condition can be highly sensitive. Teams need a clear, proportionate policy that explains why data is collected, who can access it, how long it is retained and how it supports safety. If people believe a system is primarily being used for surveillance, adoption will suffer and valuable safety reporting may be lost.

Design, fit and maintainability still decide adoption

The best technology is often the least noticeable. Controls should be usable with gloved hands. Alerts need to be felt, heard or seen in a way that suits the operating environment. Displays must remain readable without compromising night vision or creating unnecessary light discipline issues. Weight distribution matters, especially on helmets and garments worn for long periods.

Fit remains non-negotiable. Protective clothing must accommodate a realistic range of body shapes and layering systems while allowing movement, reach and access to equipment. Bespoke development can be valuable where teams have unusual load carriage, communications layouts, flight restraints or role-specific requirements. A well-designed integration is safer than asking users to improvise attachment points in the field.

Maintenance must also be planned from day one. Electronics can introduce limits around washing, decontamination, drying, storage and repair. A clear service process is essential: who checks units, how faults are reported, whether modules can be replaced, and what happens when a garment requires alteration. Equipment that cannot be maintained quickly can leave a team with a costly gap in readiness.

Start with the problem, not the feature list

Smart PPE will not replace competent training, sound command procedures or properly specified protective equipment. It can, however, give crews and procurement leaders better information at the point where it has most value: before a missed check becomes an exposure, before a welfare concern becomes an emergency, or before an unserviceable item returns to use.

For organisations considering a connected issue, begin with one high-consequence problem and trial a system that works with the equipment, conditions and people already in place. The right solution should feel less like another device to manage and more like dependable support for the person doing the job.

Choosing a Rechargeable Tactical Head Torch

Choosing a Rechargeable Tactical Head Torch

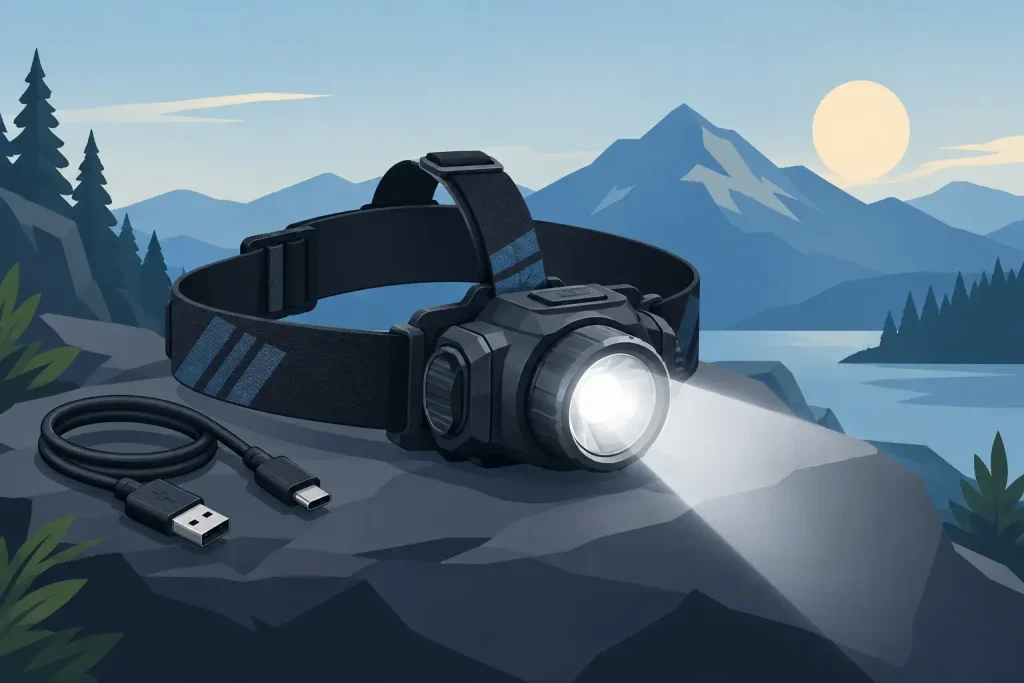
A casualty search does not pause because a battery is flat, a glove cannot find the switch or a head torch shifts on a helmet. For emergency response, defence and search teams, a rechargeable tactical head torch is not simply a convenient light source. It is part of the working system that supports safe movement, hands-free treatment, communications, navigation and task completion in poor visibility.

The right specification depends on the role. A responder working around water needs different priorities from a firefighter operating in smoke, a flight crew member preserving night vision or a tactical operator moving discreetly. The practical question is not which torch has the highest advertised output. It is whether the light will perform predictably throughout the task, on the issued helmet or headwear, in the weather and under the controls required by the team.

What a rechargeable tactical head torch must do

A tactical head torch should provide usable light rather than impressive figures on packaging. High output has a place when searching open ground, identifying a route or scanning a shoreline. It can also create reflected glare from rain, mist, snow, white PPE, maps and nearby surfaces. A well-specified torch therefore needs more than a powerful maximum mode. It needs a controlled low setting for close work, a practical medium setting for movement, and a high setting that can be used when the scene demands reach.

Beam pattern matters as much as output. A broad flood beam is valuable for casualty care, equipment checks, rope work and moving over uneven ground because it lights the immediate working area without constant head movement. A more focused spot beam carries further for search and route finding. Many operational users benefit from both, but the switching arrangement must be simple enough to use without looking at the unit.

Controls should work with wet hands and insulated gloves. A positive, well-spaced switch reduces accidental activation inside a kit bag and allows the wearer to identify the required setting by feel. Consider whether the torch remembers its previous mode, whether it cycles through unwanted flashing functions and whether a lockout is available. Strobe settings may have a role for signalling, but they should not sit in the normal operating sequence where they can be selected by mistake during patient care or a low-profile approach.

Runtime is a shift-planning issue

Published runtime figures can be misleading if they are quoted only at the lowest output. Assess runtime at the mode that will actually be used. A torch that delivers a short burst of high output before stepping down may still be suitable, but teams need to understand its sustained performance rather than rely on the headline lumen figure.

For planned deployment, calculate lighting around the full duty period, likely task intensity and a sensible contingency. Cold conditions reduce lithium-ion battery performance, while constant high-output use, flashing modes and frequent activation can shorten service time. A clear battery-status indicator is useful only if it can be checked quickly and interpreted without ambiguity.

Rechargeable power reduces the burden of carrying and disposing of single-use cells, particularly where torches are used regularly for training, routine checks and extended incidents. It also introduces a charging discipline. The torch, cable, charging cradle or spare battery system must be managed as part of pre-deployment preparation, not left until the vehicle is mobilised.

A removable battery can support longer operations if spare packs are approved, protected and carried correctly. An integrated battery may improve weather sealing and simplify the unit, but it can leave the user waiting for a recharge after the cell is depleted. Neither approach is automatically better. The appropriate choice depends on whether the team can access vehicle charging, mains power, portable power or controlled battery replacement during an incident.

Selecting a rechargeable tactical head torch for the environment

Water resistance should be selected for the exposure expected, not for a best-case forecast. Rain, sea spray, mud and brief immersion create different demands. Check the manufacturer’s stated ingress protection rating and understand what it covers. A rating for water splashes is not the same as one intended for immersion, and a charging port cover must be correctly closed to maintain protection.

For maritime, coastal and flood-rescue users, saltwater exposure also places pressure on contacts, charging connections and adjustment mechanisms. Rinsing, drying and inspecting equipment after deployment helps preserve reliable operation. Any torch used near water should be secured against loss, particularly when fitted to a helmet that may be removed during a rescue.

Fire and rescue environments require additional care. Heat, smoke, chemical contamination and the need to operate around breathing apparatus can affect both the choice and placement of the light. Do not assume that a torch is safe for a potentially explosive atmosphere because it is marketed as tactical or professional. Where ATEX, IECEx or another hazardous-area approval is required, the exact model and certification must be checked against the organisation’s risk assessment and operating procedure.

Red, green or other coloured light can be useful, but only when it supports the task. Red light may help preserve adapted night vision for navigation or low-light administration, while coloured modes can assist team identification or map reading. These functions are secondary to a dependable white working beam. They should be selected for a defined operational reason, not because they add features to a specification sheet.

Helmet mounting and fit are operational details

A torch worn directly on the head is often suitable for walking, camp tasks, low-risk searches and work where a helmet is not required. During technical rescue, fire response, water operations or tactical deployment, helmet mounting may be the safer option. The mount needs to suit the issued helmet shell, rails, clips or attachment points without compromising the helmet’s approved configuration.

Check that the torch can be tilted through a useful angle. A beam fixed too high can dazzle colleagues; one that cannot be directed downwards makes close work harder. Weight and balance also matter. A large battery pack at the front of the helmet can increase neck fatigue over a long shift and may snag when entering confined or obstructed spaces.

Compatibility should be tested with eye protection, face shields, communications headsets, hearing protection and cold-weather hoods. A torch that fits an empty helmet may interfere with other essential PPE when the system is worn as intended. Procurement teams should trial representative samples with end users, across the range of helmets and roles in service, before committing to a wider issue.

Build a lighting system, not a single point of failure

The head torch is normally the primary hands-free light, but it should not be the only light available. A compact handheld torch gives a colleague a way to direct light independently, inspect a space from a different angle or continue work if the helmet is removed. Vehicle, scene and area lighting have their own place. Each layer reduces the operational impact of one failed component.

This does not mean issuing the biggest quantity of equipment. It means setting clear expectations: which light is carried, where it is worn, how it is checked and what constitutes an unserviceable item. A damaged lens, loose mount, swollen battery, unreliable switch or compromised charging port should trigger withdrawal and inspection rather than an improvised field repair.

For organisations, standardising a small number of approved models can simplify training, charging provision, spares and replacement. It also means crews learn the same control sequence and battery indication across teams. At Rig Equipment, the most useful selection process begins with the operational environment and issued PPE, then works back to the lighting specification – not the other way around.

Care, charging and readiness checks

Rechargeable equipment earns its value through consistent maintenance. After use, clean the torch according to the manufacturer’s instructions, paying attention to seals, lens edges, mounts and contacts. Do not charge a unit that is visibly damaged, excessively hot or contaminated until it has been assessed.

Use the approved charging equipment and follow local battery safety procedures. Charging in a controlled, visible area is preferable to leaving units connected in lockers, kit bags or unattended vehicles. If a team stores equipment for extended periods, battery condition should be checked as part of scheduled inspections rather than discovered at the next callout.

Before deployment, confirm the torch turns on, changes modes correctly, locks out if applicable, shows adequate charge and remains secure on the chosen mount. This check takes moments. In darkness, wind, rain or smoke, it may be one of the checks that makes the rest of the task safer.

Choose a torch that matches the conditions your people actually face, issue it with a clear charging routine and make its use familiar before it is needed. Dependable light is built into readiness long before the incident begins.

Choosing Protective Eyewear for Responders

A wind-driven grit strike on a shoreline search, shattered vehicle glass at a roadside incident, a blood splash during urgent care – eye injury can occur before a responder has time to reassess position. Protective eyewear for responders is therefore not a minor accessory. It is a working part of the personal protective equipment system, expected to preserve vision, situational awareness and mobility when conditions deteriorate.

The right specification is rarely the pair with the highest stated protection alone. Eyewear must suit the hazard, remain clear in changing weather, fit securely with helmets and communications equipment, and be practical enough to be worn throughout the task. If it stays in a pouch because it mists up, pinches beneath a helmet or distorts vision, it is not delivering protection when it is needed.

Start With the Operational Hazard

Selection should begin with the exposure a team genuinely faces, not a generic description of the role. A firefighter working around forced entry, vehicle collisions and structural debris may require a different solution from a coastguard team dealing with salt spray, glare and high winds. Medical responders may prioritise splash coverage, easy cleaning and clear communication with patients, while tactical personnel may need ballistic resistance, all-day comfort and compatibility with night vision or helmet-mounted equipment.

Impact remains a central consideration. Lenses should resist the likely force and type of projectile, whether that is loose aggregate, fragments from damaged glass, tools under tension or training hazards. Coverage matters as much as lens material. A lens that protects directly in front of the eye may still leave a route for debris entering from the side, particularly during casualty extraction, breaching activity or travel in open vehicles.

Environmental conditions create their own demands. Bright low-angle sun over water can conceal hazards and cause rapid fatigue. Cold, wet weather increases fogging. Fine dust can enter around poorly fitting frames. In industrial or clinical environments, liquid splash may present a more immediate risk than impact. No single style is automatically right for every deployment.

Protective Eyewear for Responders: Reading the Markings

Eyewear issued for professional use should be selected against applicable PPE requirements and the hazards identified by the organisation. EN 166 remains a key reference for personal eye protection in the UK and Europe. Product markings provide useful information, but procurement teams should assess the complete eyewear assembly rather than relying on a broad marketing claim.

Impact and optical performance

Under EN 166, impact markings commonly include F, B and A. These indicate increasing levels of resistance to high-speed particles, with the appropriate rating dependent on the foreseeable risk. The frame and lens markings both matter: a high-performing lens does not make a complete unit suitable if the frame offers a lower level of protection or is not approved for the intended use.

Optical class also deserves attention. Class 1 lenses are intended for continuous wear and are generally the sensible requirement for long shifts, driving, navigation and detailed tasks. Poor optical quality can cause strain, reduced depth judgement and fatigue. These are operational risks, not just comfort complaints.

Additional markings may identify resistance to liquid droplets and splashes, large dust particles, fine dust and gas, or hot solids and molten metal. Shade markings indicate filtering performance for sunlight or specialised work. Teams should not assume that a dark lens provides the same protection as a clear lens with an anti-glare treatment, nor that a clear lens is automatically suitable in every UV-exposed environment.

Do not confuse eyewear with face protection

Safety spectacles, sealed goggles and helmet-mounted visors each have a place, but they are not interchangeable. A visor can provide broad facial coverage, particularly for fire and rescue work, yet may not protect the eyes adequately when raised, damaged or used outside its intended configuration. Goggles offer more complete sealing where splash or fine particulate ingress is a concern, although they can be more prone to heat build-up and fogging.

The question is not which item is best in isolation. It is whether the selected combination protects the responder through the task sequence, including approach, treatment, extraction, decontamination and recovery.

Fit Determines Whether Protection Is Worn

A close, stable fit is essential, but overly tight eyewear can create pressure points during a long operational period. Frame geometry should follow the face without obstructing peripheral vision or touching the eyelashes. Adjustable temples, flexible nose bridges and retention straps can be useful, particularly where personnel are moving between vehicles, watercraft, rough ground and confined spaces.

Compatibility testing should be carried out with the full issue ensemble. Try eyewear with helmets, protective hoods, respirators, hearing protection, head torches, radios and weather layers in the positions they will be used. A pair that feels acceptable on its own can become unstable when helmet padding presses on the temples, or when a respirator seal and goggle strap compete for the same area of the face.

This is especially relevant for fire and rescue teams. Eyewear must not compromise the fit of respiratory protective equipment, and it should work with the helmet visor and hood rather than creating gaps or snag points. For flight and maritime crews, consideration should also be given to headset fit, wind noise, salt exposure and the need to read instruments without colour distortion.

Prescription wearers require a planned solution. Wearing safety eyewear over everyday spectacles may be appropriate in some circumstances, provided coverage and fit are sufficient. In other roles, prescription safety lenses offer a more secure and comfortable answer. Contact lenses are not a substitute for eye protection, and they can complicate matters where dust, smoke or chemical contamination is possible.

Lens Treatments Need to Earn Their Place

Anti-fog performance is one of the most valuable features for responders, but it should be judged in operational conditions rather than on a product description. Temperature changes, exertion, rain, face coverings and respiratory equipment all challenge lens clarity. Permanent anti-fog coatings can perform differently from disposable wipes or sprays, and cleaning methods may reduce their effectiveness over time.

Anti-scratch treatments help preserve visibility, particularly for teams working around sand, dust and repeated equipment handling. They do not make a lens immune to damage. Scratched eyewear scatters light, reduces contrast and can turn vehicle headlights, searchlights or reflections into a distracting haze.

Tinted, smoke and polarised lenses each involve trade-offs. A smoke lens can improve comfort in bright conditions, but may be unsuitable when an operation extends into poor light. Polarised lenses reduce reflected glare from water, roads and glass, yet can make some digital displays harder to read. Clear lenses are usually the most adaptable choice for low-light, night and mixed indoor work. Organisations operating across varied conditions may need more than one lens option rather than asking one pair to cover every scenario.

Match the Specification to the Service

For search and rescue and coastguard personnel, the priorities often include wind stability, wide coverage, UV protection, saltwater resistance and a dependable anti-fog treatment. Retention is critical around water or on exposed ground. A lost pair of eyewear is not merely an inconvenience when the team is still tasked and conditions are worsening.

For medical responders, splash protection, cleanability and visual clarity are central. The eyewear must be quick to don, compatible with masks and face coverings, and capable of being cleaned in line with infection-control procedures. Complex venting or coatings may affect how a product can be decontaminated, so the manufacturer’s care guidance should form part of the assessment.

For tactical and defence users, the specification may focus on tested impact resistance, field of view, low-light performance and integration with helmets, communications systems and protective masks. Interchangeable lenses can be valuable, but only where the change process is secure, straightforward and does not encourage the use of damaged or incorrectly fitted parts.

Make Issue, Inspection and Replacement Routine

The most capable eyewear loses value if it is treated as an indefinite issue item. Teams need a clear inspection routine. Lenses should be checked for deep scratches, crazing, cracks, loose fittings, damaged seals and coating failure. Frames should be examined for distortion, weakened temples and degraded straps. Any item that no longer fits securely or impairs vision should be removed from service.

Cleaning also affects performance. Rinsing away grit before wiping helps avoid unnecessary scratching. Approved lens cleaners and soft cloths are preferable to improvised materials, while harsh chemicals can damage coatings, seals or plastics. Storage matters too: loose eyewear in a vehicle compartment or kit bag is easily crushed or abraded.

For procurement leads, trialling a small range with representative users is often more informative than selecting from a specification sheet alone. Include different face shapes, prescription requirements and roles. Ask users to wear samples during practical movement, vehicle use, communications tasks and work in wet or cold conditions. Record fogging, pressure points, compatibility issues and cleaning outcomes. The result is a defensible issue decision based on field use rather than appearance.

Rig Equipment understands that protective equipment has to function as a system, not as a collection of separate purchases. British-based design, technical product knowledge and practical support matter when teams need equipment that is properly specified for severe conditions.

The most useful question before issuing any pair is simple: will this eyewear still protect clear vision when the wearer is moving fast, working hard and unable to stop? Choose and maintain equipment that answers yes in the conditions your people actually face.

Cut Resistant Tactical Gloves for Operational Use

Cut Resistant Tactical Gloves for Operational Use

A glove can prevent a minor handling injury from becoming a casualty, but only when it protects the right area without compromising the task. Cut resistant tactical gloves are specified for crews and operators who may handle damaged vehicles, sharp metal, broken glass, tools, rope, equipment housings or edged threats while retaining control of radios, weapons, medical equipment and vehicle controls.

The correct choice is not simply the glove with the highest cut rating. Operational hand protection is a balance of credible cut resistance, grip, dexterity, fit, durability and compatibility with the wider system of work. A search and rescue team working around wreckage has different priorities from a tactical operator conducting a search, and both differ from a fire and rescue crew dealing with wet, contaminated debris.

Start with the actual hand hazard

Cut resistance describes a material’s ability to resist being cut under controlled test conditions. It does not make a glove puncture-proof, needle-proof, impact-proof or suitable for deliberate contact with a moving blade. It also does not protect every part of the hand equally. Many tactical designs focus reinforcement and protective liners in the palm and fingers, where the most frequent handling hazards occur, while using lighter materials elsewhere to preserve movement.

A proper risk assessment should identify what causes the potential injury, how force is applied and which part of the hand is exposed. Sharp sheet metal and broken glazing present a different challenge from a serrated edge, a protruding cable tie or a hypodermic needle. Consider whether the glove may be wet, oily, covered in fuel, exposed to heat, or worn for an extended shift. These conditions can change grip and can also affect how readily a glove can be removed or inspected.

Procurement teams should avoid specifying cut level in isolation. A glove that performs well in a laboratory may be unsuitable if its surface becomes slippery in rain, its cuff catches on equipment, or its liner is too thick for essential fine work.

Understanding cut resistance standards

For operational buyers in the UK, EN 388 is the key reference point for protection against mechanical risks. The standard records performance against abrasion, blade cut, tear and puncture, with additional testing where applicable. Cut performance can be shown through the traditional rotating blade test and, where required, the TDM test under EN ISO 13997.

The TDM result is especially relevant for high-cut materials because it measures the force required to cut through the sample with a straight blade. It is normally expressed from A to F, with higher letters indicating greater resistance in the test. That result is useful for comparing tested materials, but it is not a prediction that a wearer can safely apply a particular amount of force to any sharp object.

Ask for the full marking and supporting technical information rather than relying on broad descriptions such as “cut-proof”. Check whether the stated rating applies to the glove model and size range being supplied, not merely to a liner or an individual fabric component. Where a task includes other hazards, assess relevant requirements separately, including impact protection, thermal performance, flame resistance, chemical resistance or electrical risks.

Ratings support decisions, not shortcuts

A higher rating often brings a trade-off. Dense protective yarns and additional layers can increase bulk, reduce tactile feedback and retain more moisture. For casualty care, communications work or weapon handling, a mid-level protective glove with better fingertip control may reduce overall operational risk more effectively than a heavily lined model that users remove when precision is needed.

Fit and dexterity determine whether gloves stay on

A glove only protects the hand when it is being worn correctly. Excess material at the fingertips reduces control and can snag. A glove that is too tight restricts circulation, increases fatigue and may split at stress points. Poor thumb construction is particularly noticeable when operating radios, fastening webbing or applying dressings.

Issue a meaningful size range and give personnel the chance to try gloves during representative tasks. They should be able to close a fist, operate a torch switch, retrieve equipment from a pouch, manage a zip and use communications controls without excessive effort. For tactical users, test the glove with issued equipment rather than a generic training substitute.

Cuff design matters as well. A close-fitting cuff can reduce snagging and help keep debris out, while a longer cuff may offer better overlap with sleeves and additional coverage around the wrist. The appropriate choice depends on the garment system, the likelihood of exposure to sharp surfaces and whether rapid donning is a priority.

Selecting cut resistant tactical gloves by role

There is no single tactical glove for every service. Teams should define a small number of approved options where the operating roles genuinely differ, rather than issuing one compromised design to everyone.

For search and rescue, recovery and scene safety work, look for reliable palm protection, secure wet grip and construction that withstands rough surfaces. Reinforcement at high-wear zones is valuable, but it should not make rope handling or equipment checks unnecessarily cumbersome.

For defence and security operations, the balance often moves towards dexterity, control and low-profile fit. Gloves must work with individual equipment, vehicle interiors and communications systems. If impact protection is required, assess whether rigid or moulded features interfere with weapon manipulation, confined-space work or a casualty search.

Medical responders may need cut protection for extrication support or contaminated scenes, but they also require a clear glove-change procedure. Protective tactical gloves are not a substitute for appropriate disposable medical gloves where infection control is required. In some situations, a correctly selected system of outer protective gloves and disposable gloves is the practical answer, provided dexterity and tear risks have been assessed.

For fire and rescue personnel, structural firefighting gloves and technical rescue gloves serve different purposes. A cut resistant tactical glove should never be treated as an alternative to gloves certified for the heat, flame and water conditions of firefighting. Match the glove to the incident phase, then ensure crews understand when to change systems.

Grip is a safety feature

Grip is often discussed as comfort, when it is more accurately a control issue. A secure hold on a wet ladder rail, casualty stretcher, tool handle or vehicle component reduces the need to over-grip. Less force through the hand can improve endurance and lower the chance of a slip bringing the palm into contact with a sharp edge.

Assess palm materials in the conditions that crews encounter. Synthetic leather may provide dependable handling and abrasion resistance, while textured coatings can offer strong grip in specific environments. Neither is universally better. Some materials stiffen when wet, some become less effective around oils and fuels, and some coatings wear quickly when repeatedly used against rough surfaces.

Inspection, replacement and care

Gloves are consumable protective equipment. Cut-resistant fibres can be damaged by abrasion, snagging, heat, chemical exposure and repeated laundering. Damage may not be obvious from a quick glance, particularly on the inside of fingers or along seams.

Personnel should inspect gloves before use and after a significant contact with sharp material. Check for holes, thinning palms, loose stitching, cuts through outer layers, hardened sections and contamination that cannot be safely removed. A glove that has stopped a serious cut should be removed from service unless it has been inspected and confirmed suitable under the organisation’s procedure.

Follow the manufacturer’s cleaning instructions. Incorrect washing temperatures, unsuitable detergents or forced drying can affect fit, coatings and fibres. Keep a clear replacement route for individual users and an agreed stock level for teams. Equipment that is difficult to replace is more likely to be used beyond its safe service life.

Make the specification work on scene

The strongest procurement specification is one shaped by operational trials. Put candidate gloves into the hands of representative users, test them in wet and cold conditions where possible, and record feedback against defined tasks rather than personal preference alone. Include durability after repeated use, ease of sizing, compatibility with issued kit and the clarity of certification evidence.

Rig Equipment’s approach to protective equipment is built around the same principle: the item must earn its place in the operational system, not merely meet a catalogue description. Select gloves that users can wear for the full task, train teams on their limits, and replace them before wear becomes a risk. That is how hand protection supports readiness when the scene is unforgiving.

Specialist Uniform

Helmets

Jackets & Stormwear

Base Layers

General Apparel

Footwear

Accessories